The On-Prem Data Connector
To monitor an on-prem (locally installed) application, you’ll need to use the KS ITC Data Connector. The process for doing so is as follows:
- Go to the computer on which your on-prem application resides and identify the “connection method” by which your application’s data will be accessed. Your choices are:
- .NET database provider (recommended for SQL Server databases)
- ODBC (for non-SQL databases)
- Download the Data Connector to the computer on which the on-prem database you wish to monitor resides.
- Install the Data Connector on the selected computer.
- Make note of the Data Connector’s client unique key – this is what allows KS ITC to reach and monitor data within your on-prem application.
- In KS ITC, install the eventpak designed for your on-prem application.
- Go into the connection details for the application whose eventpak you just installed and select the option to use the Data Connector and specify the client unique key from above.
- Still in the connection details, specify the on-prem method (.NET database provider or ODBC source) that the Data Connector will use for accessing the on-prem data.
After doing step #1, proceed as follows:
- Expand the KS ITC Admin option and select Connections.
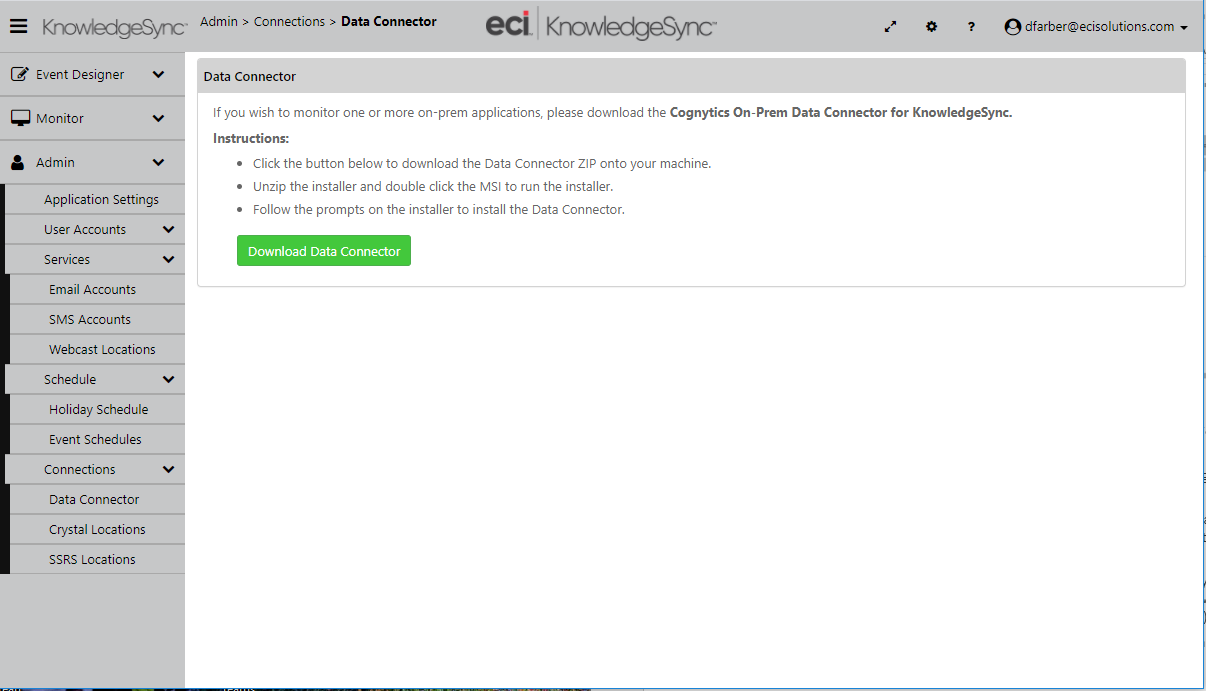
- Select Data Connector and the following window opens:
- Click on the Download Data Connector button; this downloads DataConnectorInstaller.zip as well as an On-Prem Crystal Reports (“crdownload”) component onto the local machine.
- Extract the DataConnector.zip archive to a folder and then double click on DataConnectorInstaller.exe to execute the installer. Follow the prompts and accept all of the installation defaults.
- When you come to the Additional Information window, key in KS in the Client Application field. Leave all other fields with their default values, click on the Next buttons to move to the following windows, and the short installation automatically begins and ends.
Once the Data Connector has been installed, a green circle icon appears in the system tray at the bottom of the screen. A green icon indicates that the Data Connector is running successfully. A yellow or red icon indicate installation issues, and troubleshooting is required (contact the KS ITC Support team).
On the machine where the Data Connector has been installed, right click the Data Connector icon (in the system tray) and select Show Installation Info. The following Installation Info window opens:
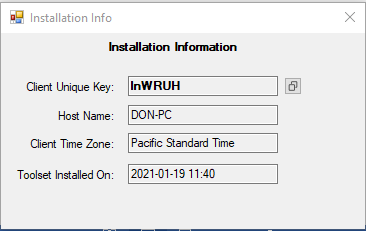
Make a note of (or click the Copy icon to the right of) the Client Unique Key. Use this key in KS when configuring events that uses the Data Connector to monitor data on the local system. (See Configuring KS to Use the Data Connector.)